


If you are a photographer using Pic-Time as your gallery software, you may have noticed that they recently launched a new blogging feature. This feature could be considered an alternative to tools like StoryTailor and Narrative. In this post, I’ll show you how to install a blog post you create in Pic-Time on your Showit site, as well as some recommendations and cautions in doing so.
How to install a Pic-Time blog on your Showit website
Installing a Pic-Time blog on your Showit website is pretty easy and straightforward! Watch the quick video below to learn how to install your Pic-Time blog, or check out the steps below.
- Create your blog in Pic-Time. Click “Share & SEO.”
- Under the heading “Integrate to your website,” click “Integrate.”
- Ensure that the integration platform selected is “Standard” and copy the code provided.
- Create a new blog post in WordPress. Add a “Custom HTML” block. Note this requires Showit’s advanced blog subscription (learn more about Showit pricing tiers here).
- Paste the code you just copied. Note that you won’t be able to see the blog itself in the builder, just the code.
- Click “Preview” to view what the published blog will look like on your Showit website.
- Set your featured image, category, and publish your post!
Pic-Time Blog SEO Settings
Within Pic-Time, you are able to edit quite a few SEO settings. Here is a quick breakdown of what each of these settings mean and what I recommend for Showit users:
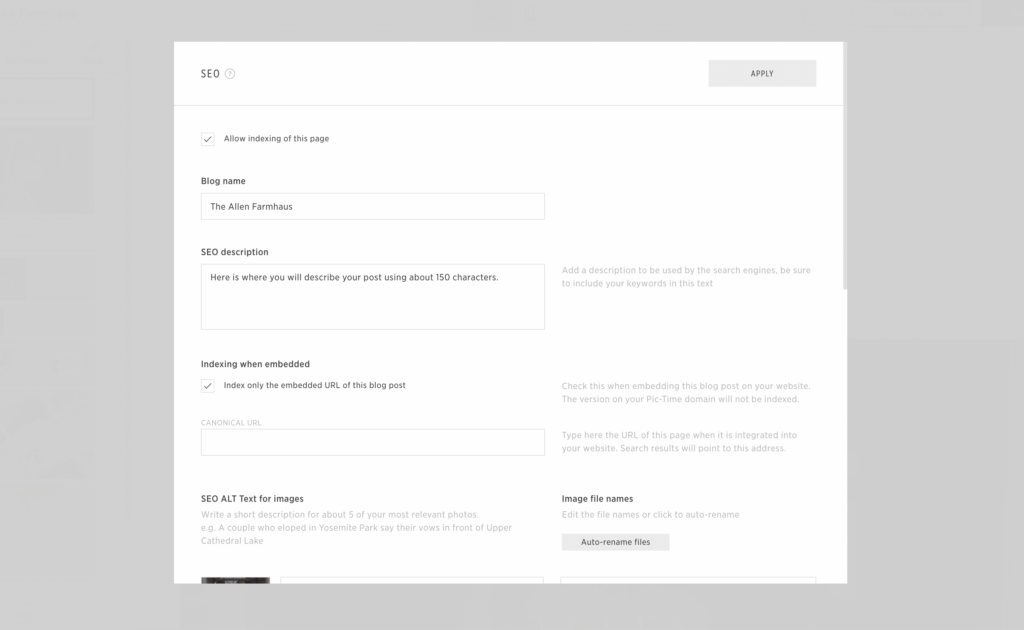
Allow indexing: By checking this box, you are allowing search engines to scan the page. You won’t be able to edit any SEO settings before checking this.
Blog name: This will be your blog post’s H1. Because you also need to set your post title in WordPress (which is automatically your H1) I recommend deleting this block from your post in Pic-Time to avoid having two H1s on the page. It is required in Pic-Time, however, so you must set a title in the SEO settings.
SEO description: This is your meta-description. It’s good practice to write about 150 characters and include any keywords you wish the post to rank for. According to Pic-Time, it is recommended to fill the SEO description both in WordPress (this would be using the Yoast plug in) and in your Pic-Time blog post. And keep in mind, Google may pull a meta-description different than the one you wrote.
Indexing when embedded: Since you are embedding your blog on Showit, you will want to check this. This means search engines will index the version of the post on your own website, not your Pic-Time domain.
Canonical URL: This is the URL where you want search engines to point to for the post. Paste the URL of the published post on your Showit site. You can do this before publishing the post if you know what the URL will be, but make sure it is the same as what you end up publishing. Or, you could go back into Pic-Time and add the link after publishing the post.
Alt text: Instead of writing alt text in your WordPress media library like a typical Showit blog post, you will write it here. Pic-Time recommends describing the most relevant images that you want to appear in search results (about 5 images). However, keep in mind alt text is important for not just SEO, but accessibility. For that reason, I recommend writing alt text for all images.
Image file name: You can leave the image file names as they are, re-name them individually, or use the “auto-rename files” button to rename the files using the alt text. I recommend keeping your image file naming convention simple (for example, “mcnay-art-museum-wedding-alex-dave-1) and don’t find it necessary to re-name image files using the alt text.
Should you use Pic-Time to blog on your Showit site?
With my web design clients, I find that blogging is such an arduous task that it often falls to the bottom of their priority lists. If using Pic-Time makes things easier for your process so that you are more likely to post blogs, then great! I say go for it! The SEO settings are pretty comprehensive so all of your text and images will be indexable by Google, and the interface is very user-friendly.
However, a few words of caution! Some things you might want to consider:
You’re in a sense, locked into Pic-Time: If you leave Pic-Time and move to another gallery software, you will lose your blog posts. Pic-Time has thought ahead with a solution to this in their “blog retention plan.” This means even if you are no longer using the gallery service, you can keep your blog posts online for $12/year. You cannot create or edit blog posts with this plan. Without this plan, if you leave Pic-Time, your blogs will be off-line and won’t appear in your Showit blog posts.
This isn’t a silver bullet for SEO: In my opinion, not all blog posts need to have the purpose of ranking in search. Some blog posts might serve your business in other ways: for example, it may be an important part of your client experience and something your clients love sharing to their friends and family on social media. Pic-Time blogs are a great solution for image-heavy posts, but in order to rank in search, your post also needs to include words. Here’s a great post from my friend Sara over at Sara Does SEO about just that.
My recommended strategy would be to use these posts to support other posts on your site via internal linking. For example, if you want to rank for a specific venue, write a post about that venue and include internal links to your posts from weddings at that venue (your Pic-Time blog posts). While the Pic-Time posts might not be ranking very high themselves, they are supporting content for posts that you do intend to rank in search.
Things break: Any time you are embedding something using a third-party platform, you are dependent upon that platform for it to work correctly. That means if something goes wrong with your post, it would be something you would resolve via Pic-Time’s customer support, not Showit’s. While the Showit support team is awesome, they won’t be able to help you if something breaks or goes wrong in your Pic-Time post.
In conclusion…
Embedding your Pic-Time blog on your Showit website is very easy. Pic-Time built out a really user-friendly, handy tool with this new blog post feature. If you already use it as your gallery software, it may be worth considering using for blogging your weddings and client sessions! Got any questions about installing your Pic-Time blog on your Showit website? Comment below!
Alex Collier is a brand and Showit web designer for wedding professionals. Are you ready for a brand and website that’s impossible for dream couples to resist? Get in touch here or shop Showit templates.
Good article. I’ve found that using custom imagery, especially photos that align with the brand’s message, helps create a more authentic experience for users. https://pixelprometheus.co.uk