


Blogging is one of the single greatest things you can do you for business’s marketing and SEO. In fact, most of my own website traffic comes from users who find my blog posts on Pinterest or Google! The bottom line? If you are serious about ranking in search and driving significant traffic to your website, you need to be blogging.
On Showit, it’s easy-peasy to create a stunning blog design with in-depth, optimized content. You get the benefit of a beautifully designed blog template in Showit, with the power of a WordPress blog. It really is a win-win situation!
PS – New to Showit? Get your first month free here!
Today I’m going to walk through the ins and outs of blogging on Showit. Let’s dive in!
Table of Contents:
How Does Blogging Work with Showit?
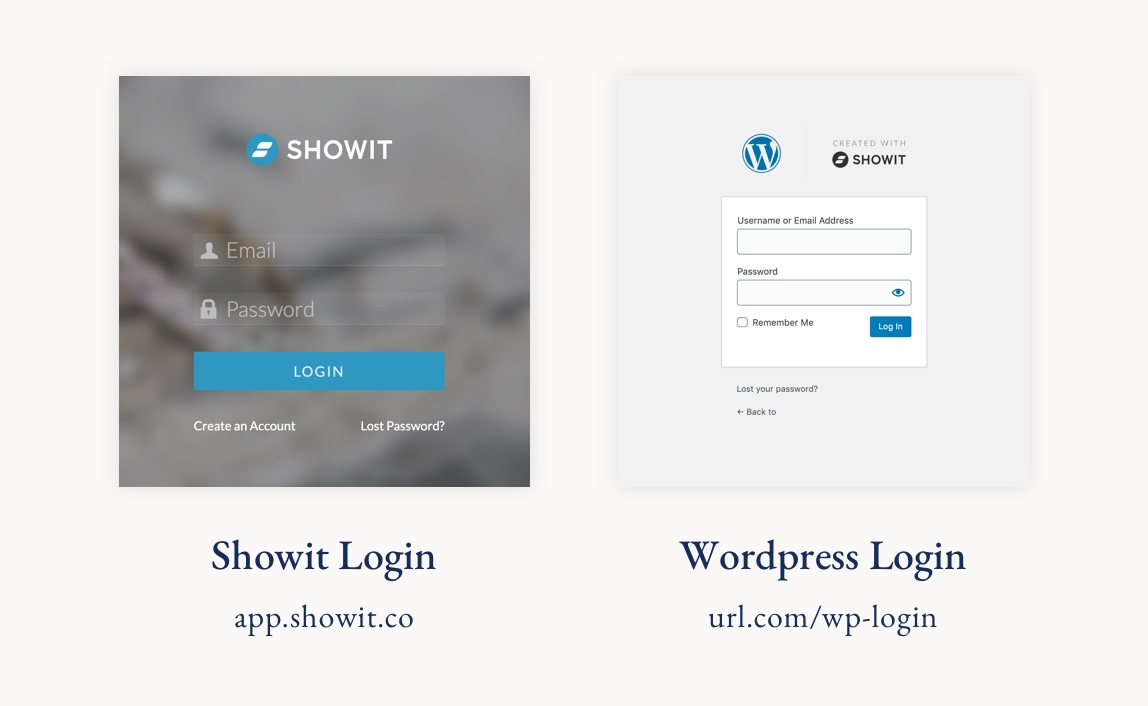
Showit is a design tool, while WordPress is a content management tool. You will design your blog theme in Showit, and write the actual blog posts in WordPress. To write and publish a blog post, log in to WordPress (yoururl.com/wp-admin) with your Showit username and password.
In Showit, you will set placeholders for where you want certain elements to populate, like the post title, date, category, and the content itself (the text and images). Then, when you publish a post in WordPress, it will automatically update on your Showit website. You do not need to worry about setting up your WordPress account, the Showit team will take care of that for you!
Setting Up Your Showit Blog
The Showit team will set up your blog for you. This will look different depending on whether you have posts on your existing site that you’d like to keep, or if this is your first blog. Either way, though, Showit will reach out to you once the set up is complete. At that point, you will be able to log in and start blogging!
Note that before you complete these steps, you will need to have a domain, which you can purchase through a registrar like Squarespace Domains. If you already have a domain name, your registrar will stay the same (Showit will request this login info).
Migrate an Existing Blog
Blog migration from WordPress or Squarespace is included on Showit’s Advanced blog tier (learn about Showit pricing tiers here). Here’s how to request a blog migration:
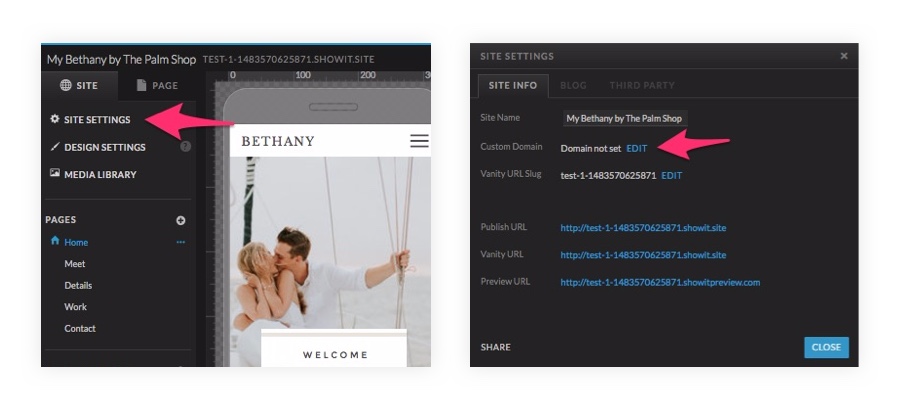
- Log in to the Showit designer and click “Site Settings.” Click “Edit” next to Custom Domain.
- Follow the domain set up steps. You will then be asked whether you would like to set up your blog. Select “Yes, proceed to blog setup.”
- Select “Migrate Existing Blog” and complete the information, such as your blog domain and login. It is crucial to get this info correct so as not to delay the process!
- When you get notification from Showit that the migration is complete, log in to your new Showit blog (at yoururl.com/wp-admin) and check that all of your posts and content are loading correctly. If the migration was successful, you can safely cancel your old Squarespace or WordPress hosting plan. You can now create and publish posts to your Showit blog.
If your current blog is on a platform that Showit doesn’t support for migration, like Wix, you can migrate your blog posts on your own (or with the help of a trusty designer). Follow the directions below to set up a new blog, then use a plugin like CMS2CMS to migrate your posts (note, this will require Showit Tier 3 since it is a custom plugin).
Set Up a New Blog
If you do not currently have a blog, or wish to start totally fresh on your new site, you will follow slightly different steps. Here’s how to request a new blog set up:
- Log in to the Showit designer and click “Site Settings.” Click “Edit” next to Custom Domain.
- Follow the domain set up steps. Select “I want Showit to setup or migrate my blog”
- Select “Set Up New Blog” and complete the information.
- When you get notification from Showit that your blog is set up, log in to your new Showit blog (at yoururl.com/wp-admin). You can now create and publish posts to your Showit blog.
Designing Your Blog in Showit
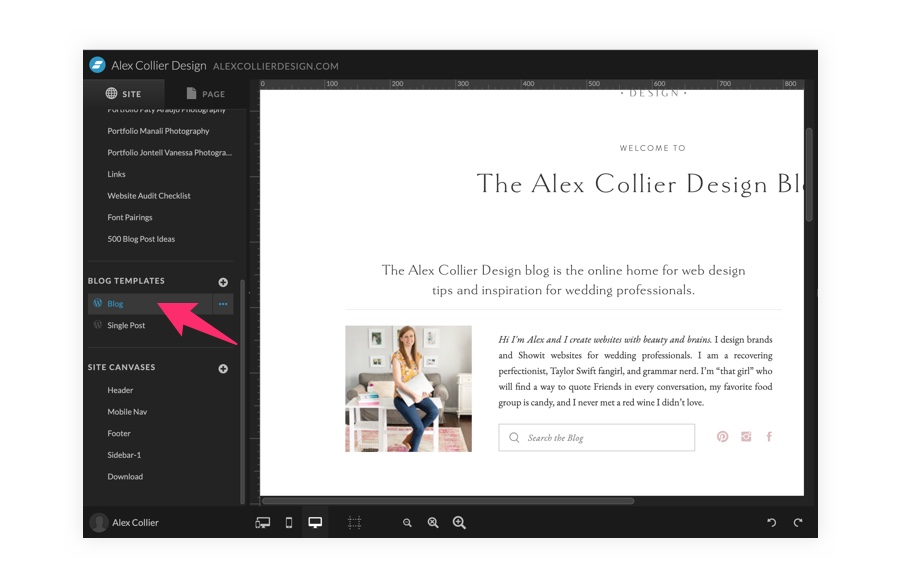
In Showit, blog templates are listed on the “Site” tab in their own section after the “Pages” section. The two basic pages that make up any Showit blog are a Blog Page and a Single Post Page. The Blog Page is a list of all of your published posts. The Single Post template is what each individual post will look like when a user opens it to read the full post.
If you are using a Showit template, your site will come with these blog pages already designed for you. As with anything in Showit, you are free to edit and change this design as much as you’d like! If you are working with a designer on a custom site, your designer will set up these pages for you. If you would like to design your site from scratch, you will need to create these pages in order to have a functioning blog. One important thing to note is that in the Showit designer or in preview, you won’t be able to see any of your actual blog content. It will only be visible on your live site.
Create a Blog Page
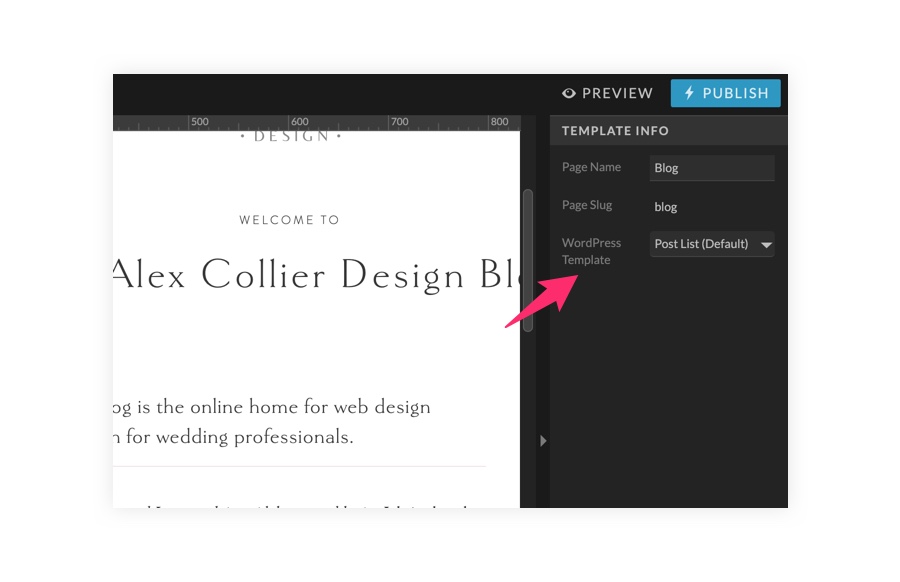
First things first. When you create a new blog page you need to assign it a WordPress template type. Click “Template Info” in the properties panel on the right and select “Post List (Default)” from the “WordPress Template” dropdown. The benefit of designing your blog pages in Showit is that you have the creative freedom to create pretty much anything you can imagine!
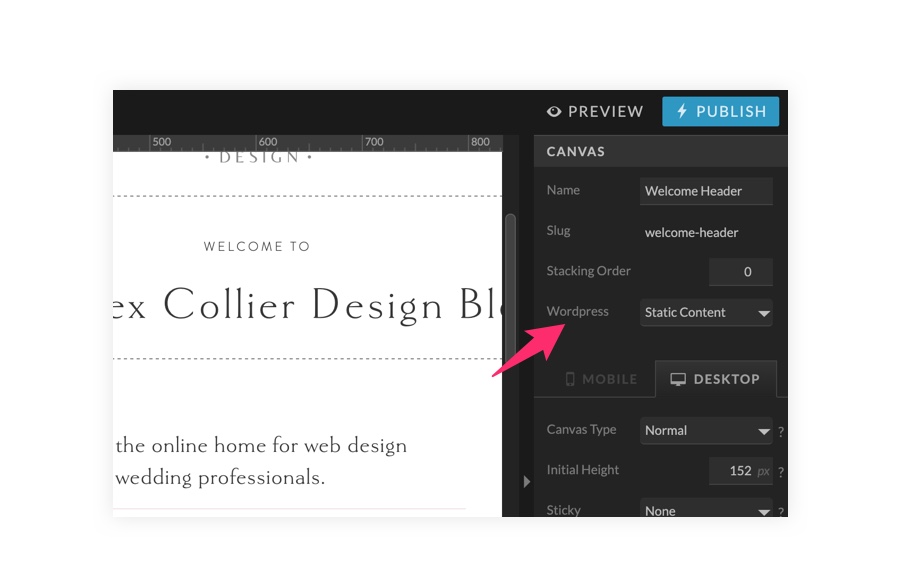
The Showit blog page template functions much like your regular Showit pages. You can add site canvases and other canvases almost the same way you would on any other page. Select “Static Content” from the WordPress dropdown in canvas settings for these types of canvases, like headers, footers, and sidebars. This tells WordPress that it will not be pulling any blog content for these canvases.
The canvases with your blog posts will function slightly differently. Here’s how to design a canvas for your blog posts:
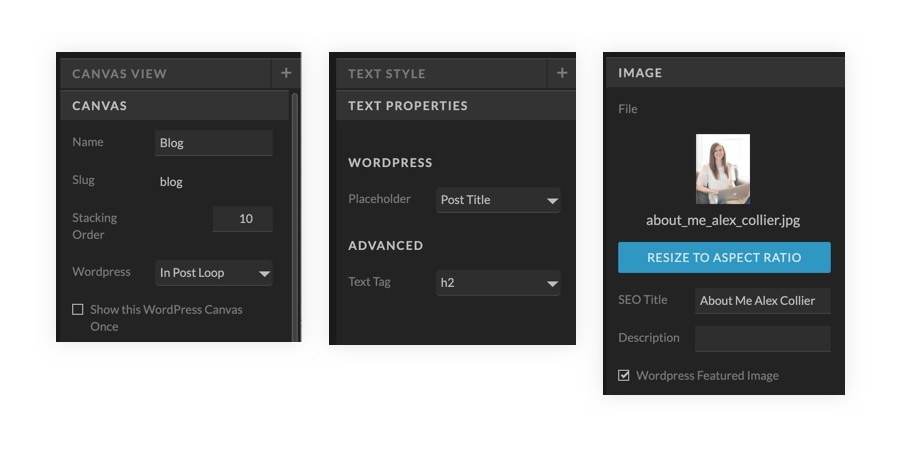
- Create a new canvas and select “In Post Loop” from the WordPress dropdown in canvas settings.
- Design the layout of your blog post using text boxes and images. You can include however much or little detail you’d like. Some common items to include are post title, image, excerpt, date, and category.
- Set your text boxes as WordPress placeholders using the “text properties” panel on the right. Select the appropriate placeholder for each text box, like “Post Date” or “Post Title” or “Post Category.”
- Set your blog to pull in a WordPress featured image by checking the box for “WordPress Placeholder Image” under the Image properties panel.
- On your live site, Showit will automatically pull in the correct information to populate your placeholders for your post. Showit will repeat that template for all of your blog posts.
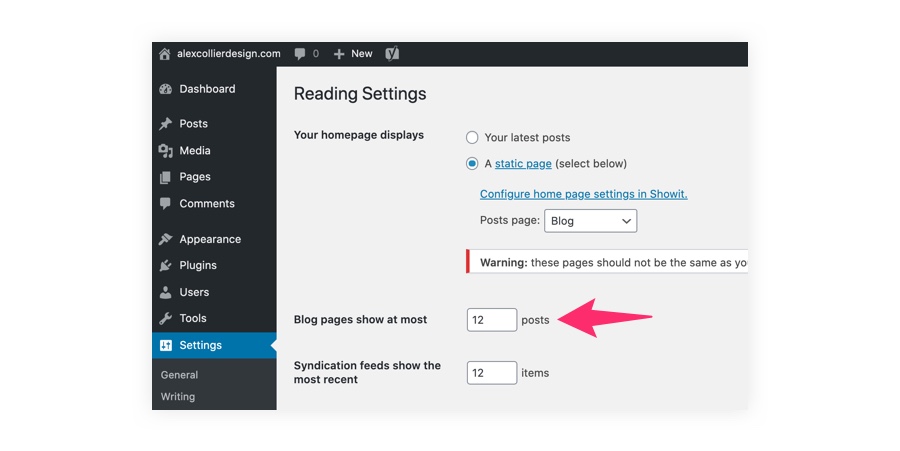
On your blog page, you will also need to create a canvas for pagination. These link to older or newer posts and allow users to easily navigate through your library of posts. Simply create and style text boxes as you’d like, then set these placeholders as “Newer Post Link” and “Older Post Link.” In WordPress -> “Settings” -> “Reading,” you can set how many posts you’d like to appear on each blog page.
Design an Alternating Blog Post Layout
You may want to add visual interest to your blog design by designing different layouts for alternating blog posts. In this case, you will follow the instructions above to design the first layout.
For the alternate layout, create a new canvas and select “Next Post Start” from the WordPress dropdown in canvas settings. This tells WordPress to pull content from a new post to populate the placeholders.
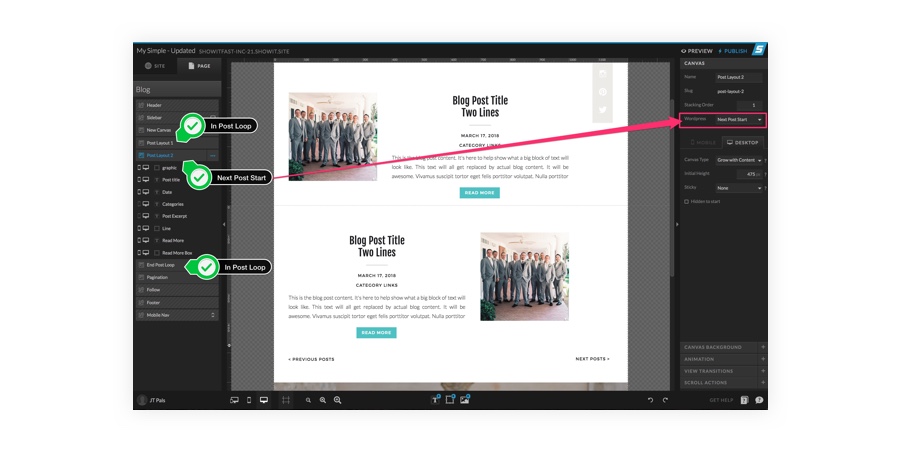
A “Next Post Start” canvas needs to be followed by another “In Post Loop” canvas in order to close the loop and signal WordPress to start the loop over again. You can do this by creating a 1-pixel tall canvas (you might want to title the canvas something like “End Post Loop” so you recall why it’s there) and selecting “In Post Loop” from the WordPress dropdown in canvas settings. This canvas won’t have any content, it just serves a functional purpose.
Design a Side-By-Side Blog Post Layout
Many creatives love the look of a tiled blog post list (if you want to see this in action, my blog page is set up this way!).
This is accomplished by designing one canvas with your first row of posts (typically 2 or 3). Then, using the same settings above, this canvas will automatically repeat according to your settings in the WordPress –> “Settings” –> “Reading.” For example, on my blog, I have three posts set horizontally. In WordPress, I have my blog set to show 12 posts at a time. The canvas, therefore, repeats itself 4 times on my blog before users must click “next” to see more posts!
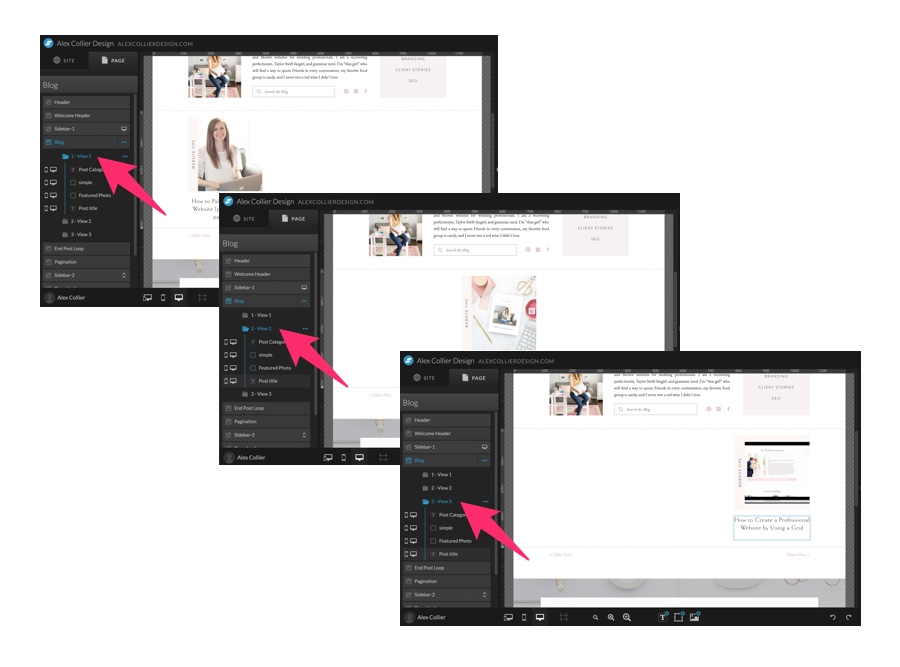
A side-by-side post layout is accomplished using canvas views. Follow these steps to create a side-by-side blog layout:
- Create a new canvas. Select”In Post Loop” from the WordPress dropdown in canvas settings and check the box for “combine views as posts.”
- Design your horizontal side-by-side layout using WordPress placeholders. Remember that this canvas automatically repeats vertically, so you are only designing the first row of 2-3 posts.
- On mobile, stack the posts vertically in the same order they are listed horizontally on desktop.
- Once everything is formatted how you like, separate the posts into canvas views. When you view your blog page in the Showit designer, you will now only see the first post/canvas view. On your live site, however, it will display your posts correctly side-by-side.
Create a Single Post Page
Now that your post list page is set up, it’s time to create a layout for the full posts themselves. Select “Single Post” as from the “WordPress Template” dropdown.
Now you can design the page using placeholders like “Post Title,” “Post Category” and “Post Content.”

Logging in to Your WordPress Blog
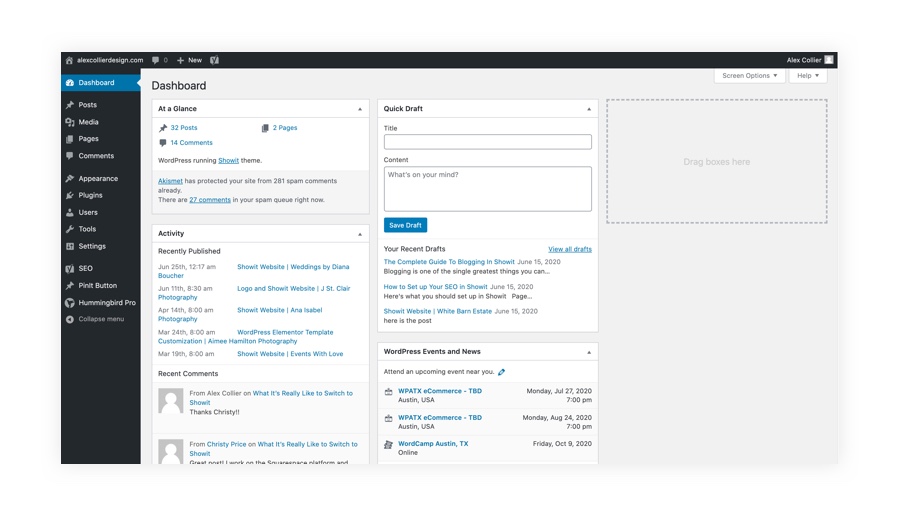
Now that your blog template is ready to go, it’s time to fill it with some amazing content! To log in to your WordPress blog, visit yoururl.com/wp-admin. Then log in using your Showit username and password. Once logged in, you will see a WordPress dashboard.
Writing Your Blog Post
You can choose to compose your blog post in a word processing document, and then copy and paste it into WordPress, or you can compose directly in the WordPress editor.
Adding Images to your blog post
To add images to your blog post, first, resize them for optimal loading time. It’s best to resize images to 2000px on the long edge, and then compress using ShortPixel or a plugin. The Showit basic blog subscription includes the use of Smush for this purpose. A faster loading time signals to Google that your site has a good user experience! It’s also good practice to name your images using a descriptive image name (for example, Kelly-and-Mike-Wedding-Reception-03 versus IMG_361305-03). This is a small SEO signal but a good practice to follow!
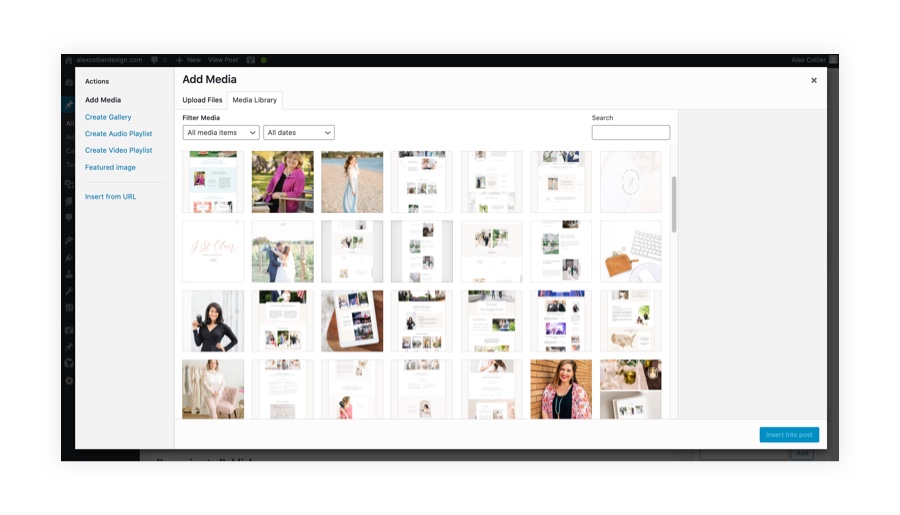
Next, add your images to your WordPress media library. This is a separate library from your Showit media library.
Finally, write alt text for your images. This should be descriptive text that explains what’s going on in the image. When you have selected an image in your media library, this will be an option on the right-hand menu.
Optimizing Your Post For Search (SEO)
The first step to optimizing your blog for search is to activate the Yoast plugin, included in the Showit basic blog plan.
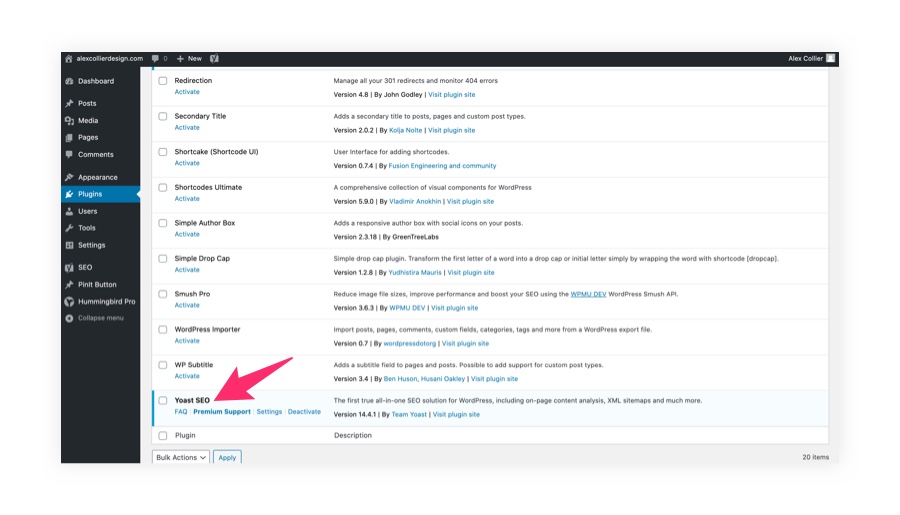
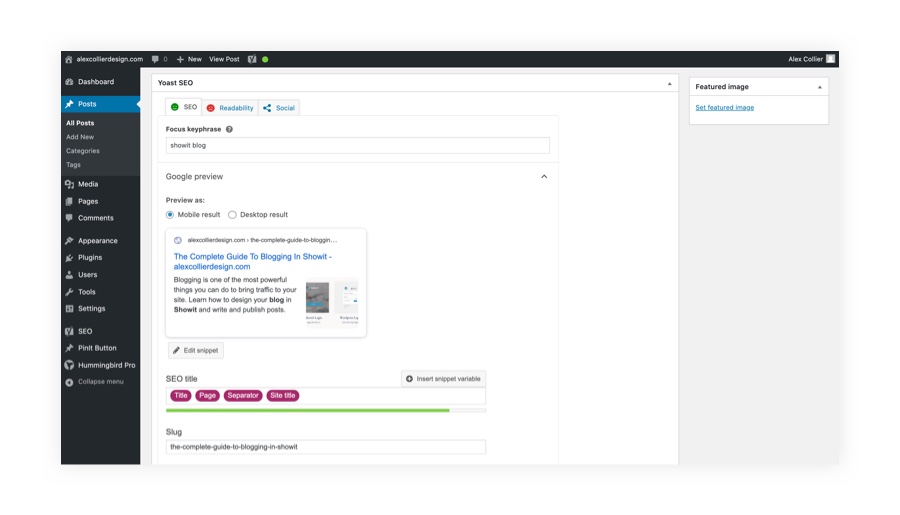
Once this plugin is activated, the Yoast tool will appear in all of your blog posts. It will evaluate your post on two metrics, readability and SEO. These metrics will appear as red, yellow, or green in the upper right corner of your interface to show how well Yoast thinks your post is optimized. I recommend using Yoast as a guide, not an exact science. For example, the “readability” metric will show as red if you use too much passive voice. But, if that’s how you talk, and your conversational tone will catch readers’ attention, that’s okay! It’s all about what creates a good user experience.
Before writing your post, it’s best to do some keyword research to make sure you are answering a real question users have. My favorite free tools for this are Ubersuggest and Answer The Public. In Yoast (at the bottom of your post under the editor), you will set your keyword and write a meta description to appear in Google.
It’s also important to remember that longer content typically ranks better in Google. I recommend at least 300 words, but more realistically 1,000 or more if you want your post to be competitive on Google.
Preparing to Publish
Remember, the content and meta-data from your post will be pulled in to the Showit template you designed on your live site. That means any placeholders you have on the Showit side need to be assigned on the WordPress side.
Most likely, your template or custom design will have placeholders for the category and featured image. You can set both of these on the right-hand panel in WordPress. You may also wish to assign tags to your post. Tags appear at the bottom of a post and allow users to click to view other posts with the same tag. This allows users to sort posts further, without the need to set a category. For example, you probably don’t want to set a category for a venue where your couples often get married, but you may wish to set it as a tag. That way, a user interested in that specific venue can click to view all post tagged with that venue name.
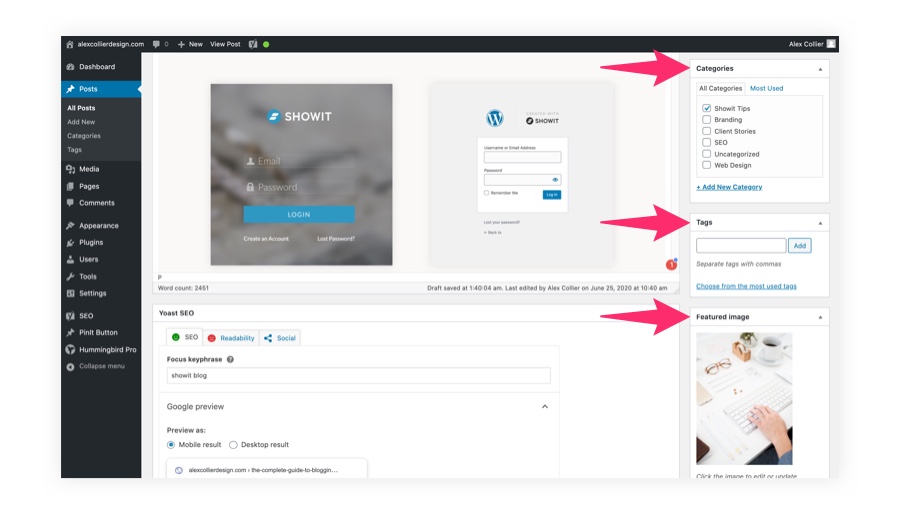
The featured image will be the image that will appear on your main blog page where your posts are listed. Keep in mind your template might be designed for horizontal, vertical, or square images. Be sure to assign your featured post accordingly! Don’t set a vertical featured image if your template is set to horizontal images. This featured image will fill whatever dimensions you set in Showit, so it will be cropped oddly if you do so. Your featured image does not need to appear within the post itself. You may set it to any image you’d like!
Publishing Your Blog Post
Before publishing, it’s a good idea to preview your post to see how it will look in your Showit blog template. You can do this by clicking the option to “preview” in the upper right-hand corner. This is the only way to see what your post will look like in your Showit template without publishing it live. You can also choose to publish immediately or set a specific date and time to publish. That means you can schedule your blog posts in the future, automating the process!
When your post is published, it will automatically populate in your Showit blog. The best part is, if you ever decide to change your blog template, the new design will automatically apply to all of your blog content!
What questions do you still have about blogging in Showit? Was this post helpful?
P.S. Need some ideas to get you started with blogging? Check out my freebie, 500 Blog Post Ideas For Wedding Professionals. It’s jammed packed with ideas specific to your niche (including calligraphy, planning, DJing, catering, and more!). You are definitely going to want to snag this one!
Thank you! I was completely lost when it came to started the blog section of the website. I am a wiz with wordpress, and a wiz with showit… but I needed a how-to with pictures on how to put them both together. My brain wasn’t braining, lol. Thanks!
So glad it helped!!
We learn that blogging is a powerful tool for increasing exposure to your business online. Actually, people who discover my blog entries via Pinterest or Google account for the vast majority of my site’s visitors. In conclusion? Blogging is essential if you want to improve your search engine rankings and attract a substantial audience to your website. Showit makes it simple to construct a beautiful blog layout with extensive, search engine optimized writing. Showit combines the functionality of a WordPress blog with a professionally designed blog template. It’s a perfect win-win scenario! This article was a joy to read for me.
This was so helpful!! Thank you!
Thank you for this great post! I’ve done some searching online and can’t seem to find any information on adding a ‘follow’ button to our blog on show it. Do you know if it’s possible to set it up so that people can follow the blog and get an email when there is a new post? Thanks for any help you can provide!
You could accomplish this using a WordPress plugin such as Subscribe2 (this would require Showit’s advanced blogging tier), or some email platforms also allow for this (Mailchimp and Convertkit for example) to connect your RSS feed to an automatic email campaign (to find the RSS feed URL for your WordPress blog, go to https://yourblogurl.com/feed/). I’ve never done this before so I can’t speak too much to the logistics though! I would typically recommend creating an email manually for each new blog post so that you can provide some additional context to entice folks to click and read more!